Microsites

Microsites

PPA

Elevated Post Base with 100mm Stand Off

The PPA is for post base installations requiring a higher standoff distance.

 

CE Marking
CE Marking
ETA
ETA
EPD
EPD
Outdoor
Outdoor
Hot-dip galvanised steel
Service class 3
Service class 3

Product Details

Images

Fixations utilisées pour pied de poteau type PPA

Features

Material

  • Steel S235JR according to NF EN 10025
  • Hotdip galvanized according to NF EN ISO 1461

Benefits

  • No machining necessary

Application

Header member

  • Supporting member: solid wood, glued-laminated wood, concrete
  • Supported member: solid wood, composite lumber, glued-laminated wood

Applications

  • Awning posts
  • Pergola
  • Veranda
  • Porch-ways
  • Car-ports

Technical Data

Product Dimensions

Dimensions

ReferenceConnector Dimensions
Product Dimensions[mm]Top plate holesBottom plate holesOther
A[mm]B[mm]D[mm]E[mm]F[mm]G[mm]t[mm]RoundRound Weight[kg]
Ø12[mm]Ø12[mm]
PPA10010010013013010048.34441.1
PPA15010010013013015048.34441.3

Product characteristic capacities

Dimensions

ReferencePost base capacity
Product capacities - Timber to Concrete
Number of FastenersCharacteristic capacities - Timber C24[kN]
On postOn concreteR₁,ₖ
QtyTypeQtyType
PPA1004Ø10x804.0Ø10*78.5 / kmod^0.4
PPA1504Ø10x804.0Ø10*78.5 / kmod^0.4

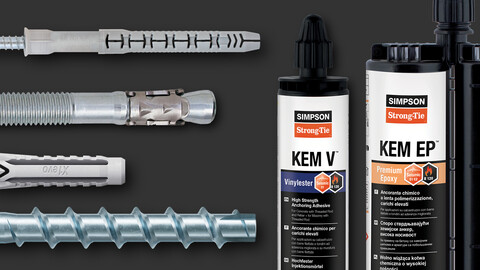
* Refer to the Simpson Strong-Tie anchor product range for suitable anchors. Typical anchor solutions are WA, BOAXII, AT-HP, SET-XP, depending on the concrete type, spacing and edge distances.

Product simplified characteristic capacities

Dimensions

ReferencePost base capacity
Simplified product capacities - Timber to Concrete
Number of FastenersSimplified characteristic capacities - Timber C24[kN]
On postOn concreteR₁.ₖ*
QtyTypeQtyType
PPA1004.0Ø10x804.0Ø10**93.2
PPA1504.0Ø10x804.0Ø10**93.2

*The published characteristic capacity is based on medium term load duration and service class 3 according to EC5 (EN 1995)(kmod = 0.7). For other load duration and service class, please refer to the ETA to get more accurate capacities.

** Refer to the Simpson Strong-Tie anchor product range for suitable anchors. Typical anchor solutions are SET-XP and AT-HP, depending on the concrete type, spacing and edge distances.

Installation

Installation

Fixing

Fixing Installation to Concrete

Mechanical Fixing

SST Recommended Fixings:  FM753 3DG – M10x75 (code 75320c10075)

Recommended Concrete Pad Size:   300mm Wide x 300mm Long x 300mm Deep (see illustration below)

Recommended Concrete Grade:  C25  (mixing ratio of 1:1.5:3 (Cement:Sharp Sand:Aggregate) with typically 0.5 water-cement ratio)

Installation Instructions:

  1. Position the post-base centrally on the concrete pad.
  2. Identify and mark out the position for the anchors.
  3. Drill holes perpendicular to the concrete surface,  Ø10 x 70mm deep.
  4. Clean the dust from the holes 3 times using a brush, pump or vacuum.  This is a crucial step.
  5. Reposition the post base and insert the anchors (tap gently with a hammer if needed) and use a torque wrench to tighten to the recommended installation torque of 50Nm

Resin Fixing

SST Recommended Fixings:  LMAS M10x110 (code LMAS1016085010)

SST Recommended Resin: ATHP

Recommended Concrete Pad Size:   300mm Wide x 300mm Long x 300mm Deep (see illustration below)

Recommended Concrete Grade:  C25  (mixing ratio of 1:1.5:3 (Cement:Sharp Sand:Aggregate) with typically 0.5 water-cement ratio)

Installation Instructions:

  1. Position the post-base centrally on the concrete pad.
  2. Identify and mark out the position for the anchors.
  3. Drill holes perpendicular to the concrete surface,  Ø12 x 85mm deep.
  4. Clean the dust from the holes 3 times using a brush, pump or vacuum.  This is a crucial step.
  5. Add Resin using dispenser and fill the hole half-way
  6. Remove nut and washer from anchors, then Insert the anchors carefully into the holes
  7. Once resin has hardened (check for a change in colour) reposition the post base over the top of the anchors, after carefully cleaning excess resin from the area
  8. Use a torque wrench to tighten to the recommended installation torque of 50Nm

PLEASE NOTE – Anchor performance will only be valid when using Simpson AT-HP Resin

Installation

Timber install

  1. Make out positions for coach Screws
  2. Drive home coach screws (SSH10x60 - 75151) through holes in base, into end grain of the timber

Certification

Declaration of Performance (DoP)

No history available

European Technical Assessment (ETA)

No history available

Environmental Product Declarations (EPD)

ZIP Packages

Buy Online

Contact

Simpson Strong-Tie Poland

Simpson Strong-Tie Etanco P.S.A.

ul. Karczunkowska 42
02-871 Warszawa
Poland